
How to Set Up fastfetch 2.68 on Linux in 2026
If you have spent any time on r/unixporn or in a Discord tech-support channel, you have seen the screenshot: a glossy ASCII art logo on the left, a tidy column of system information on the right, and a row of color swatches at the bottom. For most of the last decade, that screenshot was neofetch. In 2026, it is almost always fastfetch — and for good reason. Fastfetch is the actively maintained, faster, more configurable successor to neofetch, and version 2.68 (released in early September 2026) is the release you actually want to install right now.
This guide covers what fastfetch is, why it replaced neofetch, how to install it on every major Linux distribution, how to generate a clean configuration, and how to get the most out of the tool without fighting it.
What is fastfetch, exactly?
Fastfetch is a command-line system information tool, written primarily in C, that prints a logo and a structured list of hardware and OS facts about the machine it runs on. The visual concept is identical to neofetch: an ASCII or image logo on the left, key-value pairs on the right, terminal palette at the bottom. The implementation is modern: it actively targets Wayland compositors, supports COSMIC Desktop, Niri, KDE Plasma 6.6+, Bedrock Linux, Secure Boot detection, chassis type detection on Linux ARM, and a long list of other modules that neofetch never grew.
The project lives at https://github.com/fastfetch-cli/fastfetch and is maintained by Carter Li and a wide contributor base. Releases ship as .deb, .rpm, Arch packages, Homebrew bottles for macOS, official Windows builds via scoop/chocolatey/winget/MSYS2, and source tarballs. If your distribution ships fastfetch, you can install it in one command. If it does not — or ships an outdated copy — there is almost always a PPA, COPR, AUR package, or linuxbrew path available.
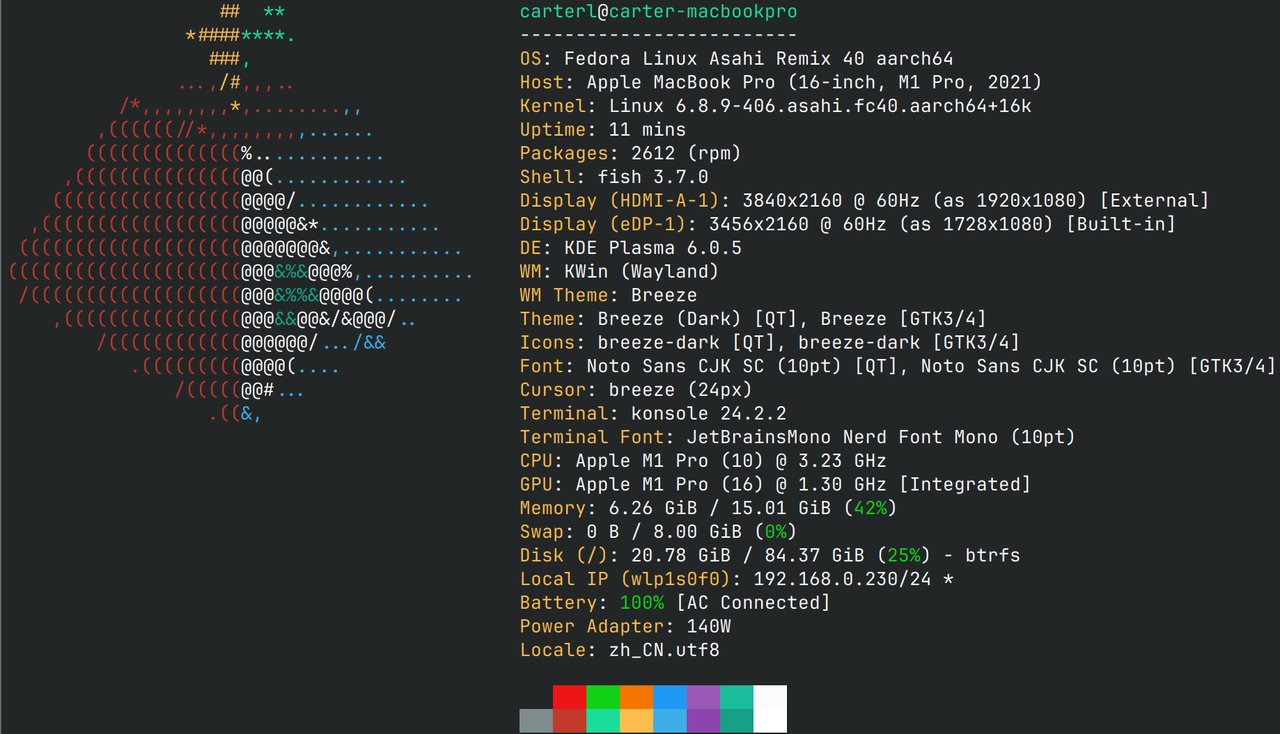
Figure: fastfetch running on Fedora Asahi Remix 40 on an Apple MacBook Pro (M1 Pro), showing the OS, kernel, uptime, packages, shell, display, DE, themes, fonts, CPU, GPU, memory, swap, disk, local IP, battery, and locale.
Why fastfetch replaced neofetch
Neofetch was last meaningfully maintained in 2021 and the upstream repository has been effectively archived. The README still says it works on macOS and BSD, but pull requests for Wayland compositor support — the most-requested feature for years — never landed. Fastfetch started as a clean-room reimplementation with three explicit goals: faster startup, more accurate detection, and Wayland support that actually works. The project hit all three.
The performance gap is not subtle. On a typical 2026-era desktop, time fastfetch reports a few tens of milliseconds of wall time, while older neofetch builds routinely take a full second because they shell out to dozens of external utilities. Fastfetch detects everything in-process, parallelizes the slow detection calls behind a --pipe flag, and caches values that do not change between runs.
The accuracy gap matters too. Fastfetch prints 555.00 MiB and 22.97 GiB where neofetch would have printed 555 MiB and 23 G. The extra precision is the difference between a system-info screenshot that looks like it was hand-edited and one that looks like it actually came from the tool.
The Wayland story is the killer feature. Neofetch’s Wayland support was always best-effort, often wrong, and frequently blank. Fastfetch knows about Sway, Hyprland, KDE Plasma 6 Wayland, GNOME on Wayland, River, Niri, COSMIC, and a dozen others. Run it in any modern Wayland session and the WM, DE, and theme fields populate correctly.
Installing fastfetch on Linux in 2026
Pick your distribution. Every command below is the one the project itself recommends in its README and wiki.
Ubuntu 22.04 / 24.04 / 26.04 and Debian 11+
sudo apt install fastfetchThis works on Ubuntu 25.04+ and Debian 13+ out of the box because the package is in the official archive. On Ubuntu 22.04/24.04 and Debian 11/12, the package exists but is older than the upstream release. For the latest 2.68.x line, add the PPA:
sudo add-apt-repository ppa:zhangsongcui3371/fastfetch
sudo apt update
sudo apt install fastfetch
Alternatively, download the matching .deb from the GitHub releases page and sudo dpkg -i fastfetch-linux-amd64.deb (or aarch64 for ARM).
Fedora, RHEL, Nobara, Bazzite
sudo dnf install fastfetchFedora 40+ ships fastfetch in the official repos. RHEL and EPEL users get it through EPEL 9/10.
Arch Linux and derivatives (Manjaro, EndeavourOS, CachyOS)
sudo pacman -S fastfetchThe Arch package is usually current within hours of upstream release.
openSUSE Tumbleweed / Leap
sudo zypper install fastfetchNixOS
nix-shell -p fastfetchOr add programs.fastfetch.enable = true; to your configuration.nix for a system-wide install.
Void, Alpine, Solus, Slackware, Gentoo, ALT
Each has a one-liner listed in the upstream README. Gentoo users run emerge --ask app-misc/fastfetch. Alpine users run apk add --upgrade fastfetch. Void users run xbps-install fastfetch. The fastfetch project maintains very explicit install instructions on its wiki.
Verifying the install
After install, run:
fastfetch --versionYou should see fastfetch 2.68.x (or whatever the current release is) and the Git commit hash. If you see something older, your distribution packaged a stale version — follow the PPA or source-build instructions for the latest.
Running fastfetch for the first time
Open a terminal and run:
fastfetchThat is the entire interface for most users. Fastfetch will detect your OS, distribution logo, kernel, shell, terminal, desktop environment, window manager, CPU, GPU, memory, swap, disk, battery, public and local IP addresses, color palette, and roughly thirty other facts, then print them in a default two-column layout.
If the default logo is wrong (for example, your distro is detected as plain “Linux” when you want the Ubuntu logo), pass --logo <distro-name>:
fastfetch --logo ubuntuTo list every logo fastfetch knows about:
fastfetch --list-logosTo see every module fastfetch can detect (rather than the curated default set), use the all.jsonc preset:
fastfetch -c all.jsoncThat output is verbose — useful for picking which modules you want in your own config, but too noisy for daily screenshot use.
Generating your own configuration
Fastfetch uses JSONC (JSON with comments) for its configuration file. The default config lives at ~/.config/fastfetch/config.jsonc. To generate one interactively:
fastfetch --gen-configThis walks you through the most important options — logo source, structure order, color choices, key formatting — and writes a config to the default path. The interactive UI requires a real terminal (not a redirect) but falls back gracefully if stdin is not a TTY.
For a hands-off version, skip the interactive prompts:
fastfetch --gen-config ~/.config/fastfetch/config.jsoncTo scaffold a minimal but well-formatted config without running fastfetch at all, you can use the online configuration generator at https://fastfetch-cli.github.io/fastfetch-config/. Pick your modules, reorder them with drag-and-drop, preview the output, and copy the JSONC to your config file.
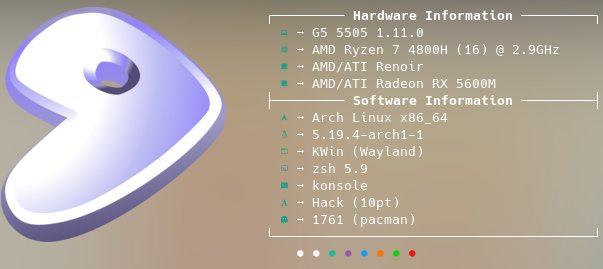
Figure: the official online config generator at fastfetch-cli.github.io. Pick modules, reorder them, and copy the JSONC.
Once the config file exists, fastfetch picks it up automatically — no --config flag needed for the default path.
Customizing modules and output
The most common edits to a fresh config are:
Removing a module you do not care about. Open ~/.config/fastfetch/config.jsonc in any editor and delete the corresponding block under "modules". For example, to drop the PublicIp and LocalIp lines:
{
    "modules": [
        // ... other modules ...
        // { "type": "publicip" },
        // { "type": "localip" },
    ]
}
Changing the order. Modules render in array order. Move the "type": "gpu" block higher if you want GPU to appear before CPU.
Picking a different distro logo. Set "logo": "arch" (or "ubuntu", "fedora", "debian", etc.) at the top level. The full list is in the wiki.
Using a custom image logo. Fastfetch supports PNG, JPEG, and even small video files as the left-side artwork. Pass the path:
fastfetch -l ~/Pictures/my-logo.pngOr set "logo": "/home/you/Pictures/my-logo.png" in the config. Fastfetch will recolor the image to match your terminal palette and print it at the configured width.
Custom format strings. Most modules accept a format field. For example, to print only the GPU name:
{
    "modules": [
        { "type": "gpu", "format": "{name}" }
    ]
}
Run fastfetch -h gpu-format to see the full format-string reference for any given module.
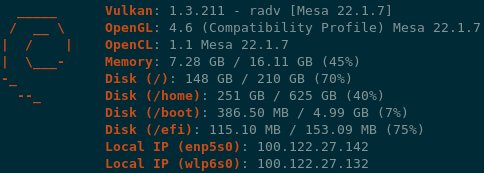
Figure: a fastfetch output with a custom image logo loaded via fastfetch -l path/to/logo.png.
A small but important warning
The Command module in fastfetch runs arbitrary shell commands and substitutes their output into the rendered fastfetch output. This is extremely useful for embedding things like your active tmux session, your current git branch, or your up-time formatted as a percent. It is also a footgun: if you copy a fastfetch config from an untrusted source, it could contain a malicious Command entry. Always review config files before dropping them into ~/.config/fastfetch/config.jsonc.
Displaying fastfetch on shell startup
Most users put fastfetch at the top of their .bashrc, .zshrc, or ~/.config/fish/config.fish. A common pattern:
# Show system info once per interactive shell
if [[ $- == *i* ]] && [[ -z "$FASTFETCH_RAN" ]]; then
    fastfetch
    export FASTFETCH_RAN=1
fi
The guard prevents fastfetch from running on every sub-shell, every bash -c invocation, and every piped command, while still showing the banner once when you open a new terminal window.
Powerlevel10k users: there is a known incompatibility between fastfetch and p10k-instant-prompt. If your banner is colorless or missing a logo on shell startup, either run fastfetch before p10k-instant-prompt in your .zshrc, or force color output with fastfetch --pipe false.
Where fastfetch is going in late 2026
The 2.6x series has been moving fast. The 2.67 line added Bedrock Linux detection and an openSUSE Tumbleweed braille logo, and 2.68 (released September 2026) stabilized 2.65.x and 2.66.x across all architectures. The wiki’s support-status page documents that Windows 7 and 8.x support is being deprecated as Microsoft ends extended support, and the project is consolidating on Windows 10/11. On the Wayland side, fastfetch now detects COSMIC Desktop, Niri, KDE Plasma 6.6, and Sway explicitly.
If you are still running neofetch in 2026, the migration is mechanical: drop neofetch, install fastfetch, copy your logo preset, and run fastfetch. Most neofetch logos translate directly via the project’s Migrate Neofetch Logo To Fastfetch wiki page. The two commands share almost identical visual grammar, and your terminal screenshot posts on r/unixporn will look indistinguishable — except now they will actually render correctly under Wayland.
Try it
sudo apt install fastfetch    # or the equivalent for your distro
fastfetch                     # default output
fastfetch --gen-config        # interactive config wizard
fastfetch -c all.jsonc        # every module fastfetch knows
That is the whole loop. Fast, accurate, and finally a neofetch replacement that you do not have to babysit.
Official project: https://github.com/fastfetch-cli/fastfetch
Configuration wiki: https://github.com/fastfetch-cli/fastfetch/wiki/Configuration
Comments