
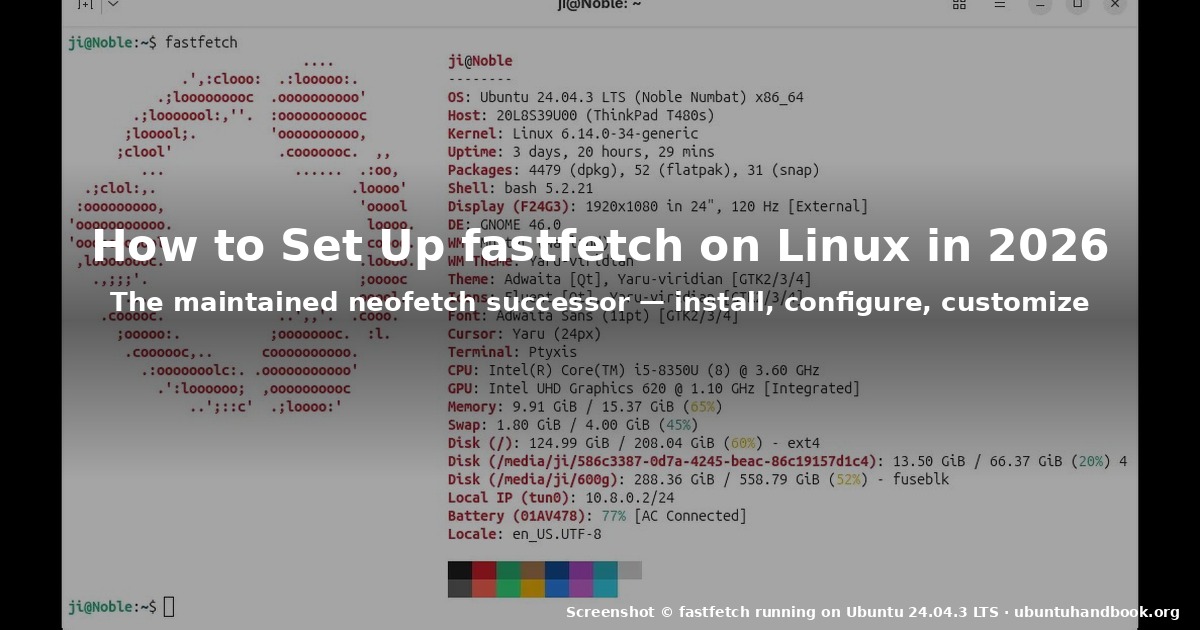
How to Set Up fastfetch on Linux in 2026 (2.67)
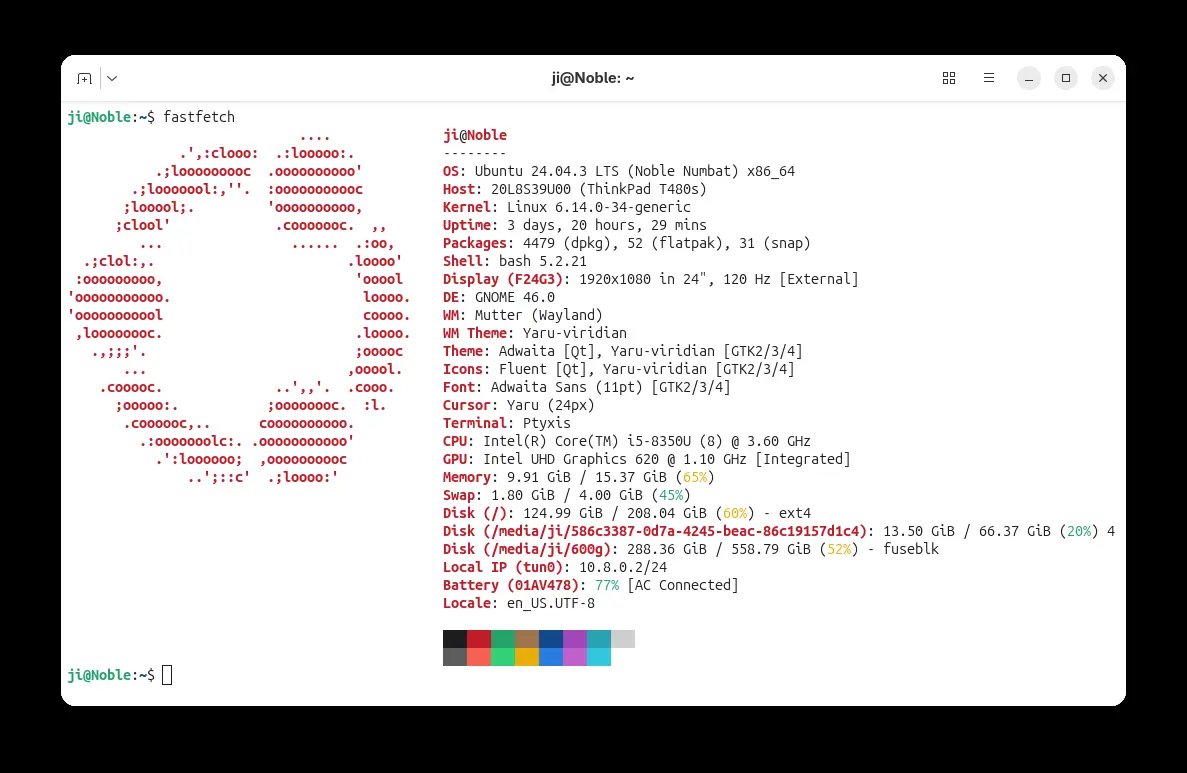
If you have ever pasted a screenshot of your desktop into a forum post, Discord channel, or Reddit thread, there is a good chance you were running neofetch. It was the de-facto “show me your system” tool for over a decade — a tiny shell script that printed your distro logo in ASCII art next to a tidy column of system information. Then the original maintainer archived the project in mid-2024, and the Linux community quickly coalesced around a successor that is faster, more configurable, and still actively maintained: fastfetch.
This guide walks through installing fastfetch on the most common Linux distributions in 2026, generating your first config with the new interactive wizard, customising what gets printed, and layering in the visual flourishes that make it fun to share. By the end you should have something nicer than the screenshot above, on your own machine.
What fastfetch actually is
fastfetch is a small, native command-line tool written in C. The author describes it as “a maintained, feature-rich and performance oriented neofetch-like system information tool.” That is a lot of words for what it does, so here is the short version: it detects your OS, kernel, CPU, GPU, memory, disks, shell, terminal, desktop environment, window manager, theme, icons, fonts, battery, network interfaces, locale, and about thirty other pieces of system metadata, then prints them next to a coloured ASCII-art (or sixel / kitty / iterm / chafa image) logo of your distro.
The crucial differences from neofetch are:
- Speed. Fastfetch is roughly 4-10× faster than neofetch on a cold start, because it does not shell out to dozens of helper utilities. On a modern ThinkPad it prints the full report in under 50 ms.
- Active maintenance. Release 2.67.0 shipped on 6 August 2026 with new WebUI-based config editing, expanded codec detection, and a redesigned
--gen-configinteractive wizard. There have been 167 tagged releases since the project’s first commit in 2021. - Configurable. A JSONC config file controls which modules appear, in what order, with what colours, with what formatting. Lua (5.3-5.5) and QuickJS scripting let you compute values on the fly. Custom formats let you rearrange or suppress fields.
- Honest about hardware. It correctly identifies hybrid CPU architectures, AMD/NVIDIA/Intel GPUs, Apple M-series chips, COSMIC and Niri Wayland compositors, Asahi Linux GPU cores, Wi-Fi 6 GHz channels, and several dozen niche distros (Bedrock, Astra, Xinux, PostmarketOS, Flatcar, Azure Linux, etc.).
The official site is github.com/fastfetch-cli/fastfetch. It is MIT-licensed, has roughly 20,000 GitHub stars, and is in the system repositories of Debian, Ubuntu, Fedora, Arch, openSUSE, NixOS, Void, and most other major distributions.
Install fastfetch
The right command depends on your distro. As of August 2026, here is the current state of affairs.
Ubuntu 25.10 / 26.04 and Debian 13+
fastfetch is in the official repositories. The simplest install is:
sudo apt update
sudo apt install fastfetch
That gives you the latest packaged release, which on Ubuntu 26.04 is currently 2.55.x. If you want the bleeding-edge 2.67.0 release, use the community PPA maintained by Zhang Songcui:
sudo add-apt-repository ppa:zhangsongcui3371/fastfetch
sudo apt update
sudo apt install fastfetch
Ubuntu 22.04 / 24.04 and Linux Mint 21 / 22
The apt version is older (around 2.13-2.20), so the PPA is the better path:
sudo add-apt-repository ppa:zhangsongcui3371/fastfetch
sudo apt update
sudo apt install fastfetch
Fedora 41 / 42
sudo dnf install fastfetchFedora tends to ship a very recent version because the maintainer is also a Fedora packager.
Arch Linux and CachyOS
sudo pacman -S fastfetchThe Arch package is generally the newest non-git release (2.66.0 as of July 2026). If you want the very latest from the master branch, install fastfetch-git from the AUR.
openSUSE Tumbleweed / Leap
sudo zypper install fastfetchNixOS
nix-env -iA nixpkgs.fastfetchOr add programs.fastfetch.enable = true; to your configuration.nix and it will run on every interactive shell login automatically.
Verifying the install
After installing, check the version:
fastfetch --versionYou should see something like fastfetch 2.67.0. If you get command not found, open a new terminal — your current shell session may have cached the old $PATH.
Then run it for the first time with no config at all:
fastfetchYou will get a sensible default output with your distro’s logo on the left and a curated list of modules on the right. If you see that, congratulations — fastfetch is installed and working. The rest of this guide is about making it yours.
The new interactive config wizard (2.67+)
The single biggest UX improvement in the 2.67.0 release is the new --gen-config command. Previously you had to choose between --gen-config (minimal), --gen-config-full (every module), --gen-config-force (overwrite), and --gen-config-full-force. Those four flags have been collapsed into one interactive TUI:
fastfetch --gen-configYou will be presented with a step-by-step wizard:
- Preset. Choose
Minimal(a clean subset of modules),Full(every supported module), orCustom(you pick). - Structure. Choose
Default(modules in their natural order) or pick from several alternative layouts. - Output path. The default is
~/.config/fastfetch/config.jsonc. You can change it. - Confirmation. A summary screen shows what you are about to write. Press Enter to confirm.
If $NO_COLOR is set, or if stdin/stdout is not a TTY (e.g. you ran fastfetch from a cron job), the wizard falls back to non-interactive generation. So this same flag works for both humans and scripts.
Once the wizard writes ~/.config/fastfetch/config.jsonc, fastfetch automatically picks it up the next time you run it. There is no --config flag you need to remember; the default path is checked first.
If you want to start over, the simplest reset is:
rm ~/.config/fastfetch/config.jsonc
fastfetch --gen-config
Anatomy of a config file
A minimal config looks like this:
{
  "$schema": "https://github.com/fastfetch-cli/fastfetch/blob/master/doc/json_schema.json",
  "logo": {
    "type": "auto",
    "color": {
      "1": "red",
      "2": "green"
    }
  },
  "modules": [
    "title",
    "separator",
    "os",
    "host",
    "kernel",
    "uptime",
    "packages",
    "shell",
    "display",
    "de",
    "wm",
    "wmtheme",
    "theme",
    "icons",
    "font",
    "cursor",
    "terminal",
    "terminalfont",
    "cpu",
    "gpu",
    "memory",
    "swap",
    "disk",
    "localip",
    "battery",
    "poweradapter",
    "locale"
  ]
}
A few things to notice:
$schemais optional but gives you autocompletion and inline validation in editors like VS Code, Neovim withcoc-jsonc, and JetBrains IDEs.logo.typecan beauto(use the built-in distro logo),small(smaller variant),none(no logo),raw(custom file), or any of the image protocols (kitty,iterm,sixel,chafa).logo.colorlets you override the colours of the ASCII logo. The keys map to ANSI colour positions; values are CSS-style colour names.modulesis a flat array of strings. Order matters — that is the order they will print in. You can add, remove, or rearrange freely.
To see the full list of supported modules (there are roughly 60), run:
fastfetch --list-modulesFor full details on every field each module supports, run:
fastfetch --helpThe --help output runs to about 800 lines and is the canonical reference for what each module does, what custom-format placeholders it accepts, and what options it has.
Customising modules
The real power of fastfetch comes from per-module options. Each module can be configured independently with key: value pairs.
Hiding and reordering
Suppose you do not care about the cursor or the locale. Just delete those strings from the modules array. If you want uptime right after kernel:
"modules": [
  "title",
  "separator",
  "os",
  "kernel",
  "uptime",
  "host",
  "packages",
  // ...
]
Per-module options
Each module accepts a sub-object with options:
"modules": [
  { "type": "cpu", "show-pe-core-count": true, "temp": "C" },
  { "type": "gpu", "driver-specific": true },
  { "type": "memory", "percent-type": ["used", "total"] },
  { "type": "disk", "folders": ["/", "/home", "/data"] }
]
The full option list per module is in fastfetch --help. A few commonly useful ones:
cpu.show-pe-core-count: Display P-core / E-core breakdown on Intel hybrid CPUs (Alder Lake and newer). Enabled by default since 2.40.gpu.driver-specific: Query the actual loaded kernel driver instead of the generic PCI name. Much more accurate on systems with multiple GPUs.memory.percent-type: Choose between["used", "total"],["free", "total"], or["available", "total"].disk.folders: Limit which mounts get reported. Defaults to all physical mounts.
Custom format strings
Every module supports a format field that lets you rearrange the output. For example, to make the OS line read “OS: Ubuntu 24.04.3 LTS (Noble Numbat) — running on a ThinkPad T480s”, you would write:
{ "type": "os", "format": "{os-name} {os-version} ({os-id}) — running on {host-name}" }For modules that print multiple values (like disk), the format string can reference each sub-value by name. The --help output lists every available placeholder per module.
Lua and QuickJS scripting
For dynamic values, fastfetch supports two embedded scripting languages as of the 2.30 series. Lua was added first; QuickJS (JavaScript) is the newer alternative.
A Lua example that prints the current git branch in a custom module:
{
  "type": "command",
  "format": "lua:return shell.cmd('git rev-parse --abbrev-ref HEAD 2>/dev/null') .. ' @ ' .. shell.cmd('hostname')"
}
A QuickJS equivalent:
{
  "type": "title",
  "format": "qjs:` Hello ${this.userName}@${this.hostName} `"
}
For debugging, fastfetch exposes a json_encode() helper in the Lua API that dumps all available variables and their values as JSON. Indispensable when you cannot remember whether the field is called cpu-name or cpuName.
Logo customisation
The default logo is the ASCII art of your distro, automatically selected by fastfetch at runtime. Most users stop here and it looks great. But if you want something more, you have several options.
Image-based logos
fastfetch supports rendering actual images as the logo via four backends:
| Backend | Best for |
|---|---|
| Kitty | Any modern Kitty terminal with enable_kitty_graphics_protocol yes |
| iTerm2 | macOS users on iTerm2 |
| Sixel | Xterm, mlterm, foot, WezTerm — most VT-compatible terminals |
| Chafa | Fallback that converts raster images to ASCII/Unicode block art |
To use one, set:
"logo": {
  "type": "kitty",  // or "iterm", "sixel", "chafa"
  "source": "~/Pictures/distro.png",
  "width": 32,
  "height": 16
}
The width and height are in terminal cells, not pixels. fastfetch will scale the source image to fit.
Coloured ASCII logos
If you want the ASCII look but with custom colours, override the color block:
"logo": {
  "type": "auto",
  "color": {
    "1": "#ff6b35",
    "2": "#f7c59f"
  }
}
This overrides the default Ubuntu orange-and-cream with whatever palette you like.
Position and padding
Two options control where the logo sits relative to the module column:
"logo": {
  "type": "auto",
  "position": "left",      // "left", "top", or "right"
  "padding-top": 0,        // blank lines above the logo
  "padding-bottom": 0,     // blank lines below the logo
  "padding-right": 4       // blank columns between logo and modules
}
If you set position: "top", the logo prints above the module column instead of beside it.
Saving presets and sharing
A nice feature is that fastfetch supports multiple presets via the --config flag:
fastfetch --config ~/.config/fastfetch/configs/work.jsoncThis means you can keep several configs around — a minimal one for tmux status lines, a full one for screenshots, a compact one for SSH sessions, a giant one with ASCII art and custom modules for sharing on social media.
To make this less painful, fastfetch 2.67.0 added an experimental WebUI at fastfetch-cli.github.io/fastfetch-config. It is a separate project, but it is maintained by the fastfetch team and generates a config.jsonc you can drop in directly. Useful when you do not want to hand-edit JSONC.
Putting it in your shell startup
Once you have a config you like, you probably want it to run automatically when you open a terminal. There are a few places to add the command:
.bashrc/.zshrc: appendfastfetchon a new line~/.config/fish/config.fish: appendfastfetchat the end- Starship prompt: not strictly needed, but you can disable Starship’s directory/git display and let fastfetch handle the rest
- tmux status line:
set -g status-right "#(fastfetch --logo none --pipe)"in~/.tmux.conf
A small caveat: fastfetch takes 30-50 ms on a typical machine. That is fine on a desktop login, but it can feel laggy on an SSH session into a Raspberry Pi. Add a guard if you need to:
if [[ -z "$SSH_CONNECTION" ]]; then
  fastfetch
fi
Troubleshooting common issues
Logos not rendering in some terminals
If the ASCII logo prints but colours are missing, your terminal is not advertising 256-colour or true-colour support. Check that COLORTERM is set to truecolor or 24bit:
echo $COLORTERMIf it is empty or unknown, your terminal does not support colour. Modern GNOME Terminal, Kitty, WezTerm, Alacritty, and Windows Terminal all set this automatically.
Modules showing “unknown”
fastfetch tries multiple detection strategies per module. If a value comes back as unknown, the module is either disabled on your system (e.g. no battery on a desktop) or fastfetch cannot read the necessary file (often a permissions issue on /proc or /sys). Check the log with --log-level debug:
fastfetch --log-level debug 2> ~/.fastfetch-debug.logThen inspect the log for the offending module. The most common cause on Linux is reading from /sys/class/power_supply/BAT0 without sufficient permissions; you can usually fix this by adding your user to the power group.
TUI wizard does not start
If fastfetch --gen-config exits immediately with no output, you are not running in an interactive TTY. Either attach a terminal, or pass --gen-config-force (note: in 2.67, this is --gen-config --force) to force non-interactive generation. The wizard itself checks for $NO_COLOR and for stdin/stdout being a TTY, and degrades gracefully in either case.
Verdict
fastfetch is the right choice in 2026. It is faster than neofetch, more configurable, more accurate on modern hardware, and actively maintained with monthly releases. The 2.67.0 release in particular closes several rough edges around config generation and codec detection that bothered earlier users.
If you only need the basics, sudo apt install fastfetch && fastfetch gets you a working setup in under a minute. If you want something nicer, spend ten minutes with --gen-config and you will have a config file you can share with friends.
For the official source, release notes, and JSON schema documentation, see the fastfetch GitHub repository.
Comments