
Reasonix is a DeepSeek-native coding agent that runs as a single Go binary in your terminal. It keeps DeepSeek’s prompt prefix stable so long sessions stay cheap. On Ubuntu you can install it three ways; pick the one that matches what your machine already has.
Before you start
You need three things on a stock Ubuntu 24.04 LTS install:
curl(most installs already have it)- a DeepSeek API key from platform.deepseek.com
- one of: Node.js + npm, a .deb download, or the Go toolchain
Reasonix itself is a static CGO_ENABLED=0 binary, so once the binary is on $PATH nothing else is required at runtime.
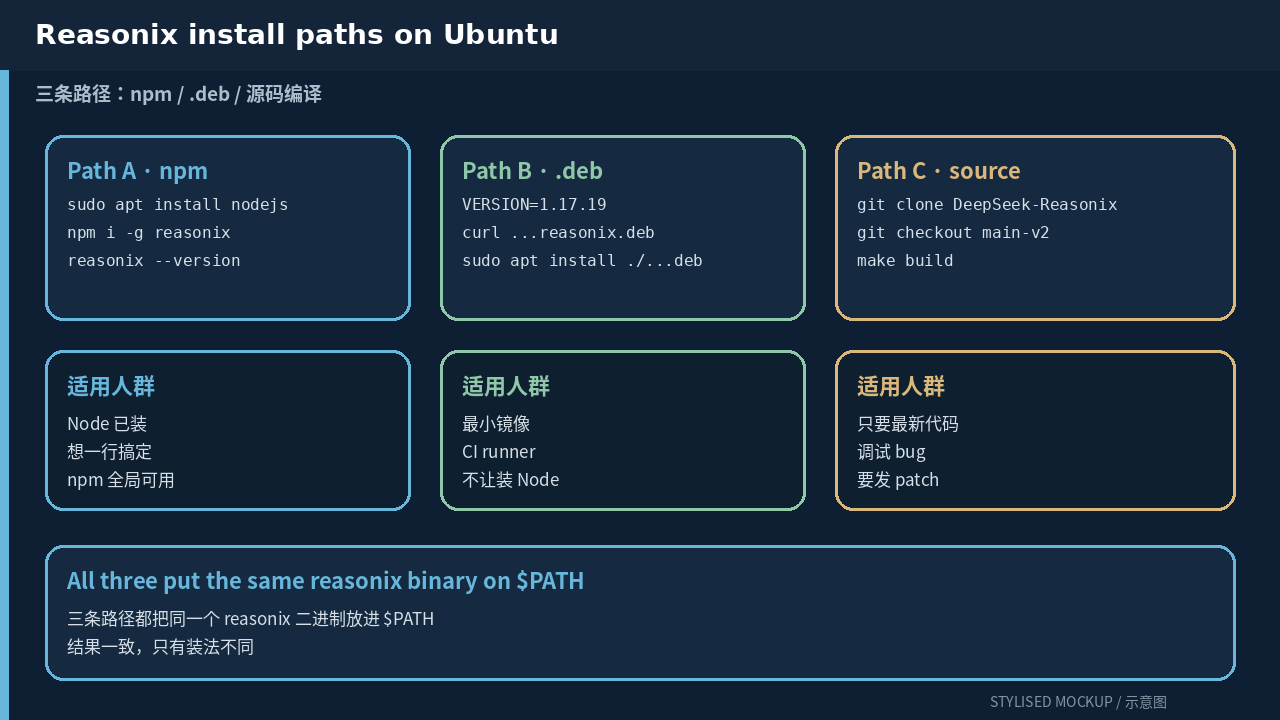
Path A — npm (fastest, works everywhere)
sudo apt update && sudo apt install -y curl ca-certificates
curl -fsSL https://deb.nodesource.com/setup_20.x | sudo -E bash -
sudo apt install -y nodejs
npm i -g reasonix
reasonix --version
npm i -g reasonix no longer installs a TypeScript runtime; starting with reasonix@1.0.0 the package pulls the prebuilt native Linux binary into npm‘s global bin directory. If reasonix --version is not on $PATH, check npm bin -g and add it to your shell rc.
Path B — .deb from GitHub release (no Node)
Use this when you want a system-wide install without Node. Pick the matching asset from the releases page:
VERSION="1.17.19"   # replace with the current release tag
cd /tmp
curl -fsSLO "https://github.com/esengine/DeepSeek-Reasonix/releases/download/v${VERSION}/reasonix_${VERSION}_amd64.deb"
sudo apt install -y ./reasonix_${VERSION}_amd64.deb
reasonix --version
Verify the checksum against SHA256SUMS in the same release before installing:
grep "reasonix_${VERSION}_amd64.deb" SHA256SUMS | sha256sum -c -This is the right path for minimal images, CI runners, and any box where adding nodejs is overkill.
Path C — build from source
sudo apt install -y build-essential git
git clone https://github.com/esengine/DeepSeek-Reasonix.git
cd DeepSeek-Reasonix
git checkout main-v2          # the Go 1.0+ branch; v1 is legacy TS
make build                    # -> bin/reasonix
./bin/reasonix --version
make cross cross-compiles to darwin|linux|windows × amd64|arm64 under dist/. Use this when you want the bleeding edge, when you are debugging a bug, or when you intend to send a patch.
Configure the provider
The binary is installed, but Reasonix still does not know which model to call. Run the interactive wizard:
export DEEPSEEK_API_KEY="sk-..."
reasonix setup
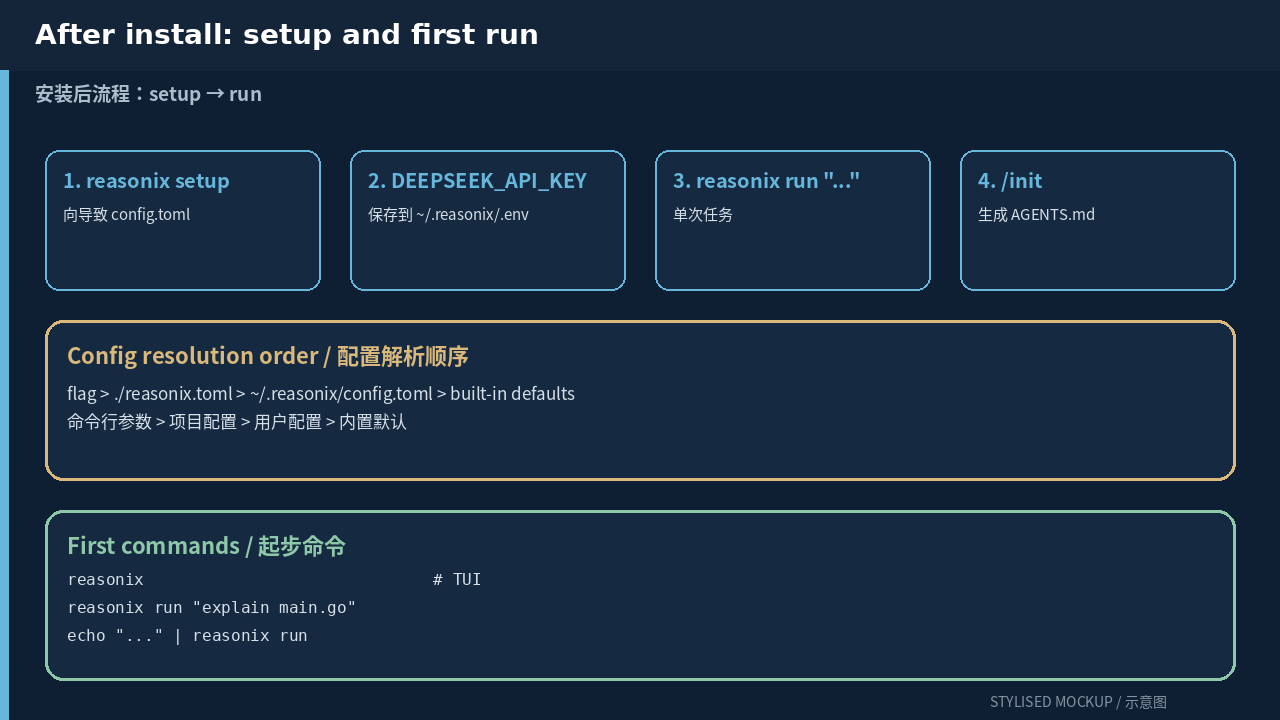
The wizard writes ~/.reasonix/config.toml on Linux and saves the API key into ~/.reasonix/.env. If you prefer a hand-written config, create the same two files directly.
A minimal ~/.reasonix/config.toml:
default_model = "deepseek-flash"

[[providers]]
name        = "deepseek-flash"
kind        = "openai"
base_url    = "https://api.deepseek.com"
model       = "deepseek-v4-flash"
api_key_env = "DEEPSEEK_API_KEY"
Resolution order is flag > ./reasonix.toml > ~/.reasonix/config.toml > built-in defaults, so a project-local reasonix.toml overrides the user file when you cd into that project.
First session
reasonix                          # interactive TUI; type /init to generate AGENTS.md
reasonix run "explain the auth flow in main.go"
reasonix run --model deepseek-pro "add unit tests for this function"
echo "refactor the parser" | reasonix run
/init scans the current directory and writes an AGENTS.md so future sessions remember the project layout. /plan on switches the agent to read-only planning. /pro requests a stronger model for hard refactors. /doctor checks API key, config, hooks, and project state when something refuses to start.
Updating and removing
# npm path
npm i -g reasonix@latest

# .deb path
sudo apt install -y --reinstall ./reasonix_<new_version>_amd64.deb

# remove the user config entirely (deep clean)
rm -rf ~/.reasonix
Reasonix stores config in ~/.reasonix/ and nothing else. Uninstalling the binary plus removing that directory is a complete reset.
What changed since Reasonix 1.0
The npm i -g reasonix command has always existed, but what it installs is different now. Pre-1.0 the package shipped a TypeScript runtime and v1 branch still does; from 1.0.0 onward the package is a thin wrapper around a prebuilt Go binary. If you upgraded an old install and something broke, check whether the old v1 branch leftover is still in your $PATH.
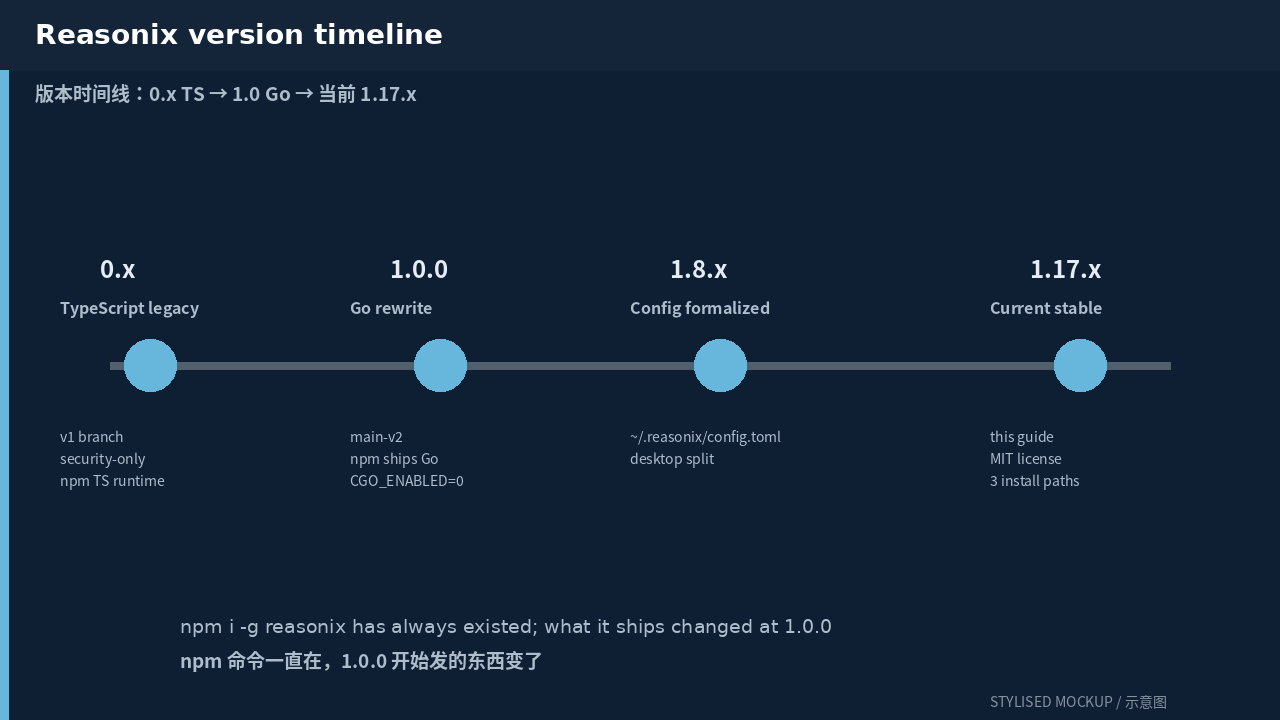
| Version | Note |
|---|---|
0.x (legacy) |
TypeScript build on the v1 branch; only security fixes. |
1.0.0 |
Ground-up Go rewrite on main-v2. npm i -g reasonix now ships the Go binary. |
1.8.x |
User config location formalized at ~/.reasonix/config.toml. Desktop app splits its own release tag. |
1.17.x |
Current stable line used by this guide. |
Common failure modes
reasonix: command not foundafternpm i -g— your shell did not pick upnpm bin -g. Restart the shell or add the printed path to~/.bashrc.setup: api_key not set— the wizard reads$DEEPSEEK_API_KEYfrom the shell or from~/.reasonix/.env. The key string itself never goes intoconfig.toml.- The agent edits the wrong file — install a project-local
reasonix.tomlwithpermissions = "ask"and approve each tool call interactively. git cloneof the legacyv1branch — checkoutmain-v2explicitly; the TypeScript build is no longer the supported path.
Comments